How to Record Rap Vocals at Home: Practical Tips for Beginners
Rap is a music genre where the lyrics and vocal performance play a crucial role. Therefore, if you’re an aspiring artist or just want to record your own rap songs from the comfort of your home without having to go to a recording studio, it’s important that you know how to effectively record your vocals. In this article, we’ll provide you with a series of practical tips for beginners that will help you record rap vocals at home with the best possible quality. From choosing the right microphone to adjusting the recording software, we’ll cover everything you need to know so you can create impactful and professional rap songs.
Preparation for Recording Rap Vocals at Home
Preparation is a fundamental aspect of achieving a successful recording of rap vocals at home. Before starting to record, it’s important to consider some key factors to ensure the best possible results.
Firstly, it’s essential to have a fully written and practiced song. Making sure you know the lyrics and melody well before recording will prevent mistakes and save time and effort in post-production.
Secondly, it’s important to select the appropriate instrumental for the song and ensure that the beat suits well with the vocal style. Also, setting the correct tempo and making sure the instrumental track is adjusted to the same is important.
Moreover, it’s essential to take care of vocal health before recording. Drinking plenty of water, resting the voice, and avoiding smoking or drinking alcohol before recording are important factors to consider for a clear and accurate recording.
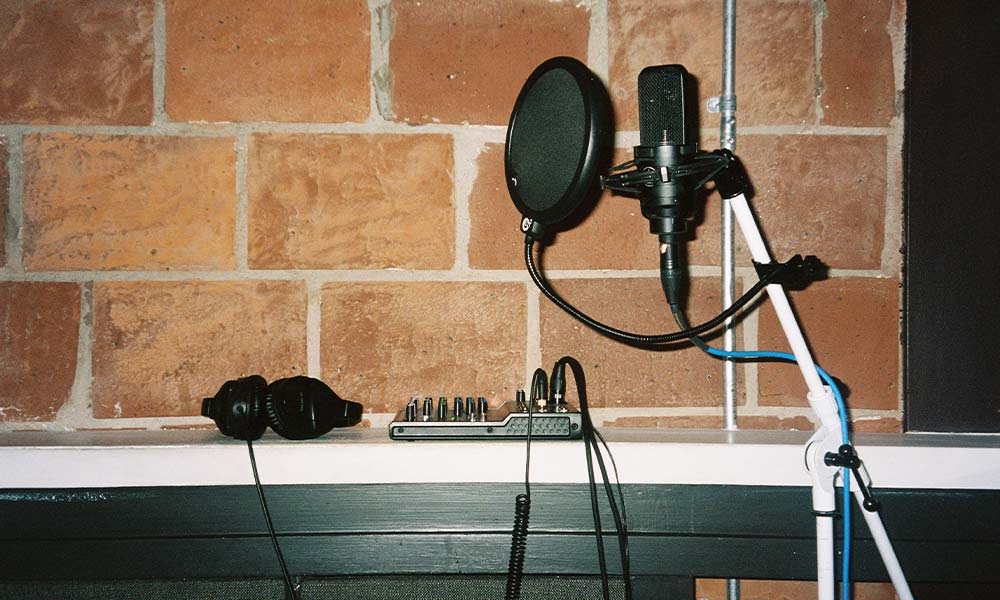
Finally, it’s important to have the appropriate recording equipment and tools at hand, such as a good audio interface (also known as a sound card), a quality microphone (it doesn’t have to be an expensive professional microphone), a microphone stand, and a reliable audio recording program. This will ensure that the recording is carried out under the best possible conditions.
Prepare Your Home Recording Space
Properly preparing your home recording space is crucial for achieving good quality in your rap vocals recording. Before starting to record, you should ensure that the space is clean and free from any objects that might generate noise or interfere with the recording. Here are some tips to prepare your home recording space:
- Choose a quiet, silent room: If possible, select a room in your home that has the least amount of external noise. Staying away from windows, doors, and appliances is a good idea to reduce background noise.
- Condition your space: You can place rugs, thick curtains, cushions, or other sound-absorbing materials to improve the quality of your recording space. The aim is to prevent sound reflection, which can create an unwanted echo or reverb effect on the vocal recording. You can even try to set up a homemade recording booth.
- Use a quality microphone: A quality microphone is essential for getting a good recording of your rap vocals. There are many options available in the market, but make sure to choose one that fits your needs and budget.
- Eliminate any noise source: Before starting to record, make sure to turn off any device that generates noise, such as fans, air conditioners, or any other appliances. Also, mute your phone and any other unwanted sound source.
- Test the acoustics of your space: Do some recording tests and listen to how your voice sounds. If you notice excessive echo or reverb, consider adding more sound-absorbing materials to improve the sound quality.
By following these tips, you can prepare a suitable home recording space for recording professional-quality rap vocals.
Choose the Right Equipment to Record Rap Vocals at Home
The choice of the right equipment to record rap vocals at home is crucial for obtaining good sound quality. Below are some key elements you should keep in mind:
- Microphone: This is the most important component for a quality vocal recording. Choose a large-diaphragm condenser microphone, as it better captures the details and nuances of the voice. Handheld microphones can be useful for more casual recordings, but they don’t produce the same sound quality.
- Audio Interface: An audio interface converts the analog signal from the microphone into a digital signal that can be processed by the computer. Make sure the interface has enough microphone inputs and good analog-to-digital conversion quality.
- Pop Filter: This is a mesh placed in front of the microphone to reduce the sounds of air blasts when pronouncing certain letters, like “p”. This helps to maintain a clearer, distortion-free recording.
- Microphone Stand: A stable and adjustable microphone stand is important for keeping the microphone in the correct position and avoiding background noise.
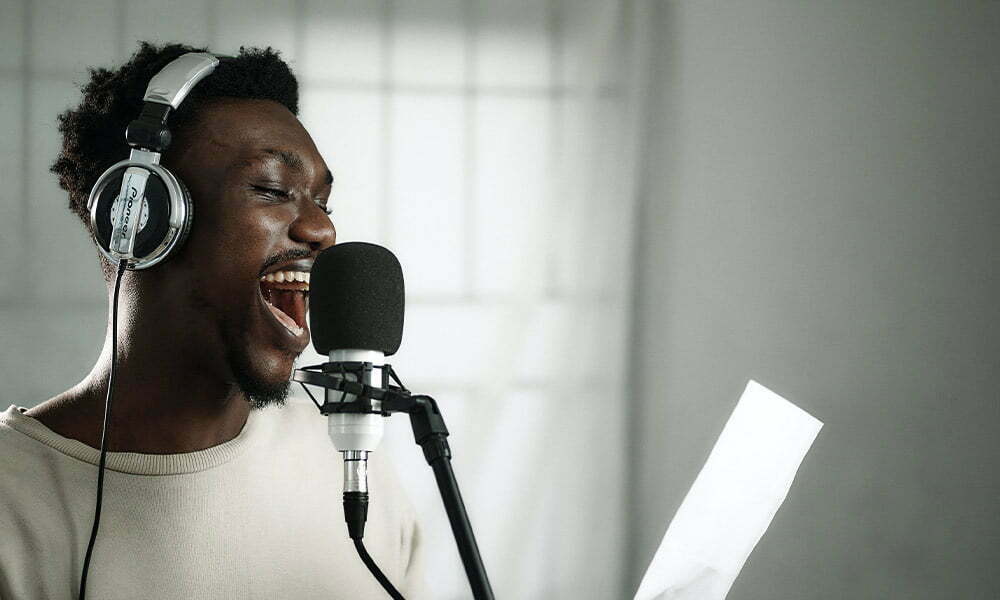
- Headphones: Use closed-back headphones to listen to the recording while you’re making it. This will allow you to detect any issues or unwanted noise in real-time.
Remember, you don’t need to invest large amounts of money to get good equipment. With appropriate investment and selecting the key elements of your setup, you can achieve quality recordings at home.
How to Make a Good Voice Take Before Recording
Before you start recording rap vocals at home, it’s important to ensure that a good voice take is performed. A good voice take not only guarantees the quality of the vocal recording but also helps save time and effort in post-editing. Here are some tips for making a good voice take:
- Vocal Warm-up: Before starting to record, it’s important to do a vocal warm-up. The vocal warm-up helps to relax the throat muscles and prepare the vocal cords for recording.
- Test the Microphone: Make sure the microphone is working properly and that it is set up correctly for recording, connected to the main microphone input. Do a test to ensure that the microphone is capturing the voice clearly and at the appropriate recording level.
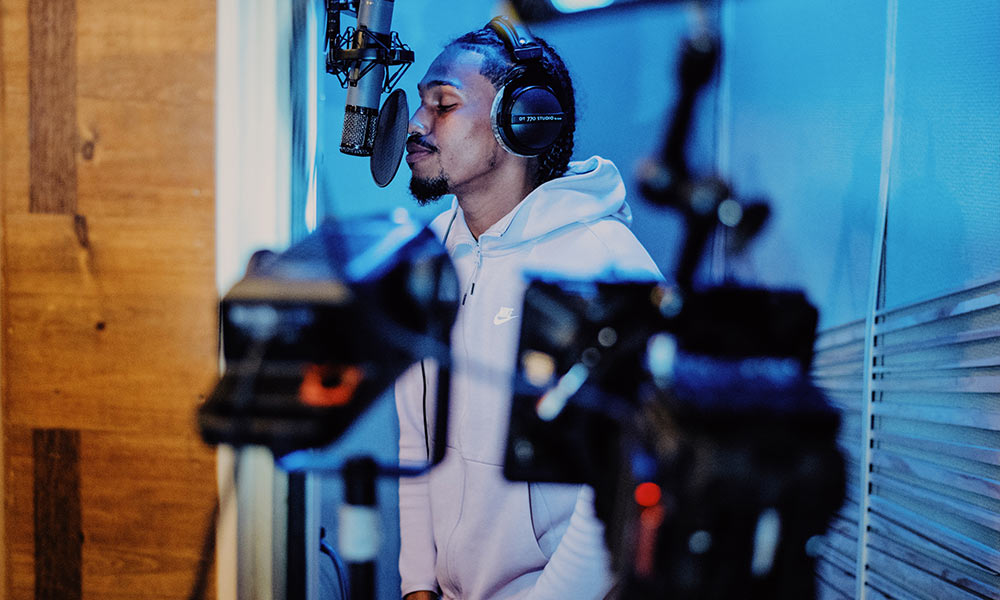
- Control the Environment: The place where the voice is recorded should be as quiet as possible, free from background noise and with good acoustics. Small, cozy rooms, like closets or carpeted rooms, can be ideal for voice recording.
- Use Headphones: Wearing headphones during recording can help ensure that the voice is being recorded with the appropriate quality. Moreover, it allows you to hear mistakes in real-time and correct them before continuing with the recording.
- Take a Break: Taking a break between voice takes can help maintain vocal quality and avoid vocal fatigue.
By following these tips, you can make a good voice take and ensure that the recording of your rap vocals at home is of the best possible quality.
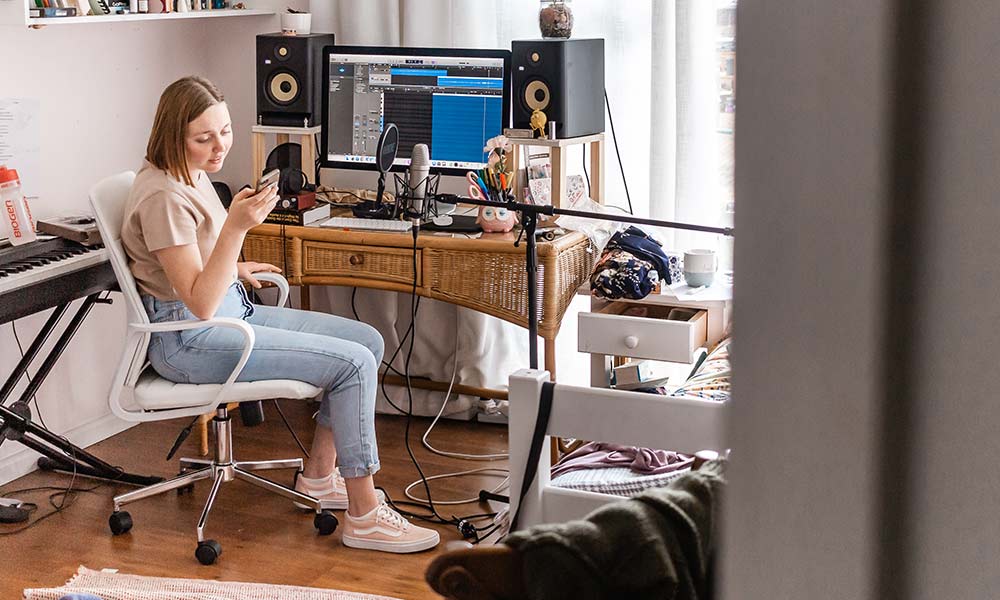
How to Set Up a Quality Home Recording Space for Rap
Setting up a quality home recording space to record rap vocals can make a big difference in the quality of the final outcome. A good setup can help minimize background noise, provide suitable acoustics, and give the rapper a comfortable environment to record.
Here are some practical tips for setting up a quality home recording space for rap vocals:
- Find a Suitable Space: Choose a space in your home that is large enough to accommodate the equipment and allows some privacy for recording without distractions. Avoid spaces with high ceilings and reflective wall and floor surfaces that can create echo and reverb sound.
- Isolate the Space: The acoustics of your recording space can significantly affect the quality of your recording. Carpets, thick curtains, or pillows can help reduce echo and background noise. You can also use specific acoustic panels to reduce reverberation.
- Control External Noise: Try to minimize external noise as much as possible. Make sure the windows are closed and the doors are well sealed. If there’s still background noise, consider using a noise insulator or recording at a time when there’s less external noise.
- Use Suitable Lighting: Ensure your recording space has suitable lighting so that the rapper can read the lyrics well and not strain their eyes too much.
- Test Your Space: Before recording, do a test recording to make sure your recording space is quiet enough and has suitable acoustics. Listen to the recording and adjust the setup if necessary.
By following these tips, you can set up a quality home recording space for rap vocals and achieve a professional recording.
Select the Right Room: Tips for Choosing the Best Place at Home to Record Your Rap Vocals.
When it comes to recording rap vocals at home, the choice of recording space is critical to ensuring sound quality. Although it’s possible to record in any room, some are more suitable than others for creating a quality recording space.
To select the right room, it’s important to consider some key factors. First, choose a room that is as far away as possible from any external noise sources, such as a busy street or a running washing machine. This way, you can minimize the interference of external sound in your vocal recording.
Another important factor is the size of the room. Small rooms may be easier to acoustically treat, meaning you can better control the sound quality. On the other hand, large rooms may have a more natural and spacious sound.
Additionally, consider the acoustic characteristics of the room. Rooms with high ceilings, hard walls, and wooden floors can create a brighter and more resonant sound, while rooms with low ceilings, soft walls, and carpets can create a warmer and more muted sound.
Lastly, it’s important for the room to be as quiet as possible. This means avoiding rooms with windows facing a busy street or where household noise can interfere with the vocal recording. It’s also recommended to place soundproofing materials on the walls to minimize sound reflection.
Acoustic Treatment: How to Improve the Quality of Your Home Recordings Using Household Materials.
Acoustic treatment is a key factor in creating professional-quality voice recordings at home. It’s important to minimize the negative effects of reverberation and echo, which can ruin the clarity and quality of vocals. Fortunately, there are many cost-effective ways to improve the acoustics of a room using household materials.
One of the first steps to improve the acoustics of a room is to reduce the amount of reflective surfaces. Bare walls, hardwood floors, and windows can cause sound to bounce and accumulate, causing an echo effect in recordings. To address this, materials such as carpets, curtains, blankets, and pillows can be used to absorb sound and reduce reflections.
It’s also important to consider the use of acoustic panels. While professional acoustic panels can be purchased, they can be expensive. Therefore, a more budget-friendly option is to make homemade panels using materials such as rockwool, acoustic foam, or even towels. These panels can be mounted on the walls and ceilings of the room to improve acoustic quality.
Another option is to use room dividers or screens. These can not only help reduce the amount of reflective surfaces but also provide a more isolated and private recording space.
Set up your recording equipment: how to adjust your microphone, preamplifier, and software to get the best sound possible.
Properly setting up your recording equipment and signal chain is essential to achieving high-quality sound when recording rap vocals at home. Ensuring that your microphone, preamplifier, and software are properly configured can make a significant difference in the quality of your recordings.
First and foremost, you need to ensure that your microphone is properly connected and positioned. If you’re using a condenser microphone, it’s important to connect it to a preamplifier and adjust the appropriate gain level to avoid distortion and obtain a clean signal.
Additionally, it’s crucial to adjust your recording software to achieve the best possible quality. Tweaking the equalization, compression, and other effects can significantly enhance the quality of your recording. It’s also important to adjust the input level to prevent saturation and achieve a clean and clear signal.
Remember that every microphone and preamplifier is different, so it’s essential to experiment with different settings to find what works best for you. With the right configuration, you can achieve professional-quality vocal recordings in the comfort of your own home.
Practical tips for recording rap vocals at home with professional quality
Recording rap vocals at home can be a challenging task, but it’s not impossible. With the right equipment, proper recording techniques, and a few tricks, you can achieve professional-quality vocal recordings in the comfort of your own home. Here are some practical tips for recording rap vocals at home with professional quality:
- Ensure you have an appropriate recording space: a location where you can control noise and acoustics, free from external interference.
- Use a quality microphone: a good microphone can make a significant difference in the quality of your recording. Choose one that suits your budget and needs.
- Utilize a quality preamplifier: a good preamplifier can help enhance the quality of your vocal signal before it reaches your recording equipment.
- Configure your recording software correctly: adjust the settings of your DAW to achieve the best recording quality possible.
- Ensure you have an appropriate input level: avoid your vocal signal being too low or too high by correctly adjusting the input levels.
Take multiple vocal takes: record multiple vocal takes for each rap line to have options and choose the best one.
- Adjust the equalization and compression: use these tools to enhance the quality of your voice and make it sound more balanced.
- Properly mix your vocals: once you’ve recorded your vocals, make sure to mix them properly in your project so they fit perfectly with the instrumental.
By following these practical tips, you’ll be able to record rap vocals at home with professional quality and take your music to the next level.
Select the appropriate microphone for recording your rap vocals at home
Choosing the right microphone is one of the most important parts of recording rap vocals at home. There are many types of microphones available in the market, but not all of them are ideal for recording rap vocals.
To start, it is recommended to use a dynamic microphone or a condenser microphone. Dynamic microphones are more rugged and usually more affordable, while condenser microphones offer superior sound quality. If you’re on a limited budget, you can opt for a dynamic microphone, but if you want professional sound quality, a condenser microphone is the best choice.
It’s also important to consider the microphone’s polar pattern. The polar pattern refers to the direction from which the microphone captures sound. For recording rap vocals, a cardioid microphone is recommended as it captures sound from the front of the microphone and minimizes unwanted background sounds.
Lastly, make sure to choose a microphone that fits your budget and needs. There are many options available in the market, from budget-friendly microphones to high-quality models, so it’s important to research and compare before making a decision.
How to adjust equalization and compression to improve the quality of your rap recordings
Equalization and compression are two important tools for achieving good recording quality in your rap vocals. Equalization allows you to adjust the sound of the voice to desired characteristics, while compression helps control the dynamics of the voice and maintain a consistent volume level.
To adjust the equalization, it’s important to understand the different frequency ranges of the voice and how each of them affects the sound. Generally, the following settings are used:
- Low frequencies (60Hz-250Hz): to add weight and body to the voice.
- Mid frequencies (250Hz-4kHz): to provide clarity and presence to the voice.
- High frequencies (4kHz-20kHz): to add brightness and air to the voice.
Regarding compression, the goal is to maintain a consistent volume level of the voice throughout the recording. This is achieved by using a compressor and adjusting the appropriate parameters such as threshold, ratio, and attack.
It’s important to note that there is no one-size-fits-all setting for equalization and compression that works for all types of rap voices. It’s necessary to experiment with different settings and find the configuration that works best for your voice and rap style.
Learn to edit your rap recordings to achieve the perfect final result
Editing your rap recordings is a crucial part of the music production process. It’s during the editing stage where you can enhance the quality of your recording and achieve the perfect final result. To get started, make sure you have appropriate audio editing software installed on your computer, such as Ableton, Pro Tools, or Audacity.
Once you have the software, the first step is to import your rap recordings into the editing project. Next, listen to each take and select the best one to use as the foundation for your song. You can also cut and remove any unnecessary or low-quality parts from the recordings.
After selecting the best take, it’s time to make adjustments to levels, equalization, and compression. Ensure that you adjust the level of each track so they sound balanced. You can also adjust the equalization to enhance or reduce certain frequencies and achieve a cleaner and clearer sound. Compression can also be helpful to control the levels of your rap recordings and make them sound more consistent.
Other editing techniques you can use include adding effects such as reverb, delay, or distortion, creating harmonies, and duplicating tracks to add more depth. You can also experiment with automation to create changes in effects and volume throughout the song.
FAQ:
Do I need professional recording equipment to record rap vocals at home?
Not necessarily, although it’s recommended to have a good quality microphone and recording software. In the article, you will find tips on how to choose and set up the appropriate equipment for home recording.
What type of room should I choose to record my rap vocals at home?
It’s advisable to choose a room that is as quiet as possible, preferably without windows and with sound-absorbing materials such as carpets, thick curtains, etc. In the article, you will find more details on how to choose the best place at home to record your rap vocals.
How can I improve the quality of my home-recorded vocals without spending a lot of money on professional equipment?
There are several household materials you can use to improve the acoustic treatment of your recording space, such as blankets, pillows, homemade acoustic foam, etc. Additionally, the article will provide you with tips on how to adjust equalization and compression to enhance the quality of your rap recordings.
Do I need advanced audio editing skills to achieve good results when recording rap vocals at home?
Not necessarily, although it’s recommended to have some basic knowledge of audio editing to clean up and enhance your vocal recordings. In the article, you will find practical tips for editing your recordings and achieving the perfect final result.
What is the most suitable microphone for recording rap vocals at home?
There is no one-size-fits-all answer to this question as it depends on your needs, budget, and personal preferences. However, the article will provide you with some guidelines for choosing the most suitable microphone for your home rap recordings.
CONCLUSION:
As we have seen in this article, recording rap vocals at home can be a challenging task, but with practical tips and proper preparation, it can be a highly rewarding experience. It’s important to select the right room and apply acoustic treatment to improve the recording quality. Additionally, choosing the appropriate equipment and configuring it correctly are essential to achieving a professional sound. Don’t forget to make a good vocal take and adjust the equalization and compression for the best possible result. Finally, editing is key to achieving the perfect final outcome. We hope these tips help you achieve high-quality rap vocal recordings in your home. Go for it!